Why an earth fault causes surprising symptoms
An electrical circuit needs a path back to the battery as well as a supply to the component. On many classic cars, metal body panels, the chassis and the engine form part of that return path. An earth connection is the joint that links a lamp, motor or instrument to it. Corrosion, loose fasteners, old paint or a damaged strap can interrupt the path without breaking the supply wire.
The result is not always a component that simply stops working. A lamp may glow faintly, an indicator may affect another light, a gauge may move unexpectedly, or a starter may turn slowly. These symptoms can occur when current finds an unintended route through another circuit. They are clues, not proof: a weak battery, faulty switch or damaged supply wire can produce similar trouble.
Before testing, find out whether the car is positive-earth or negative-earth. British classics may have either arrangement, and a previous owner may have converted one. Check the battery connections and the car’s wiring information rather than relying on its age or badge. That distinction matters when connecting test equipment and replacement electrical accessories.
Start with the circuit that misbehaves
Make a short list of what happens and when. Does one rear lamp dim only when the brakes are applied? Do several instruments act oddly when the headlamps are on? A fault affecting one fitting suggests a local connection; several unrelated faults may lead you toward a shared earth point, battery connection or engine-to-body strap. Working from the symptom outward is usually more useful than cleaning every visible terminal at random.
With the ignition off, inspect the affected component’s earth wire or mounting point and follow it toward clean metal or a shared junction. Look for loose eyelets, green or white deposits, frayed strands, rust beneath a terminal, and fasteners that grip paint rather than metal. Check plugs as well: a sound body earth cannot compensate for a poor contact inside a connector. Keep notes or take photographs before removing wires so each one returns to the right place.
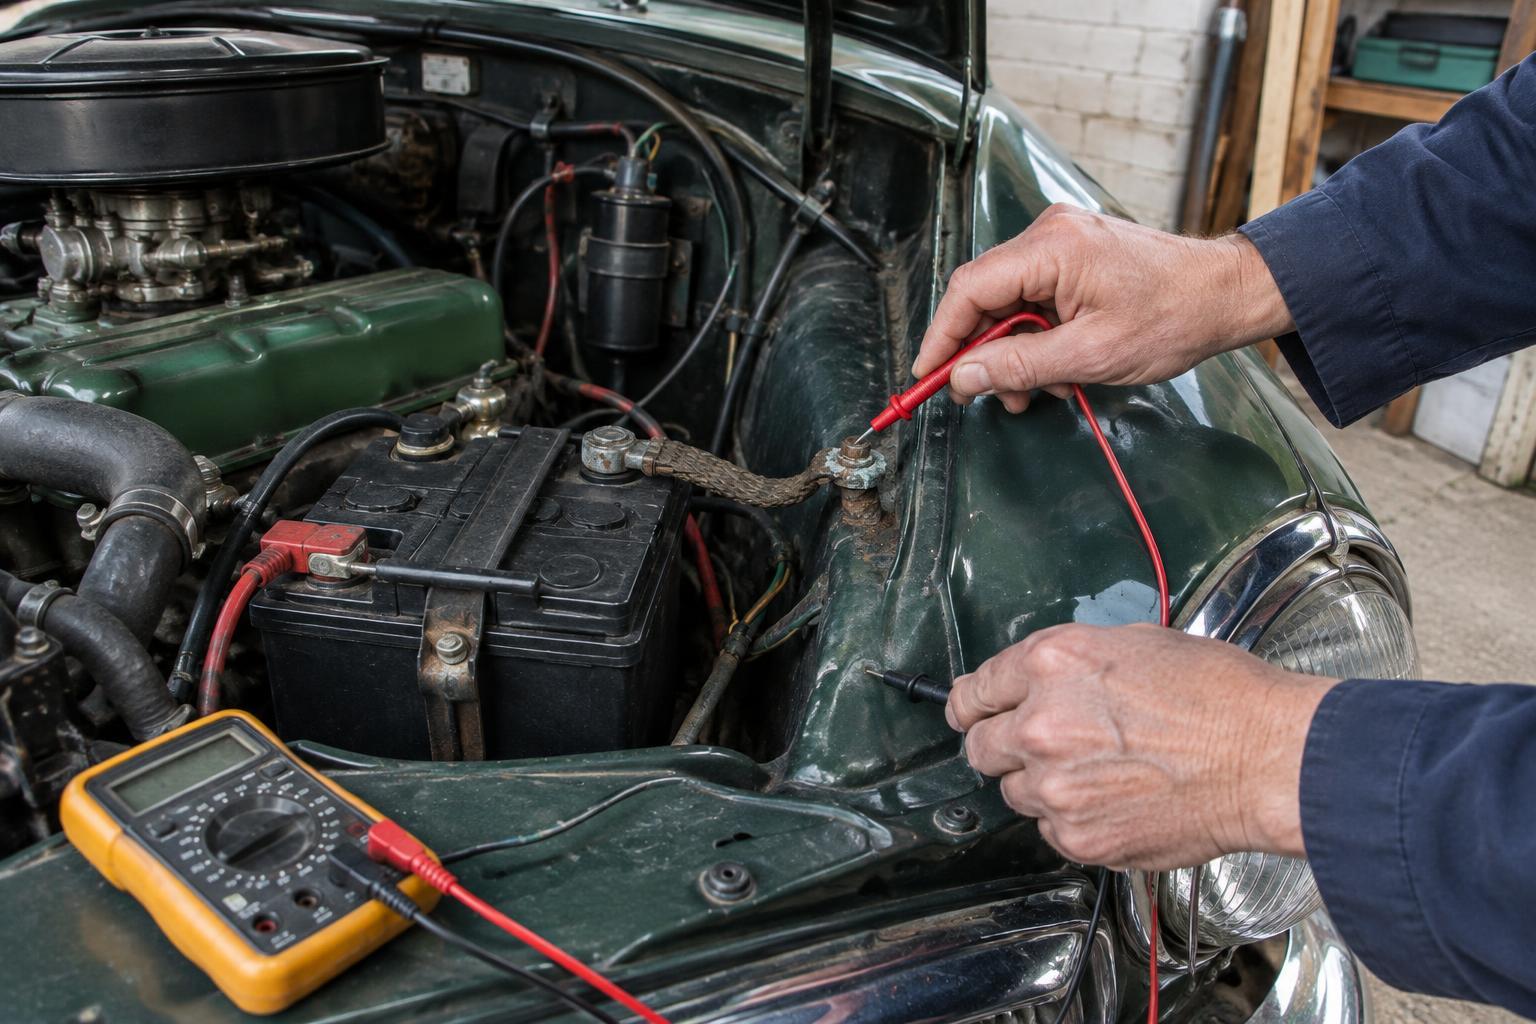
Pay particular attention to battery-to-body and engine-to-body connections if starting or charging symptoms are involved. The engine may be mounted on rubber, so it needs a dependable electrical link to the rest of the car. Do not assume a cable is sound because its outer covering looks intact; examine its terminals and the metal beneath them.
Test the connection under load
A visual check may miss resistance hidden inside a crimp or between two apparently tight surfaces. A voltage-drop test can help: the circuit is switched on, and a multimeter measures the difference in voltage between two points along its return path. A healthy connection should account for little of the available voltage. An appreciable reading across one joint while the component is operating suggests that joint needs attention.
For a troublesome lamp, for example, place one meter probe on its earth terminal and the other on a known good point farther along the return path, such as the relevant battery terminal. Then switch on the lamp. Move one probe along the path to narrow down where the drop appears. Follow the meter’s instructions, use the correct voltage setting, and keep probes clear of moving parts and accidental contact between terminals. The method works regardless of earth polarity, but polarity may change the sign shown on a digital display.
An unpowered continuity test can be useful for finding a completely open wire, but it is less convincing for a marginal joint: a tiny test current may pass where a working lamp or motor struggles. Never use a meter’s resistance setting on a live circuit. If you are uncertain where to place the probes, stop and consult a wiring diagram or an experienced auto electrician.
Make a sound repair, not a temporary workaround
Before undoing a suspect connection, switch everything off and disconnect the battery, removing the terminal connected to the body first. This reduces the chance of a tool shorting against the body while you work. Keep metal tools away from the other battery terminal, and do not disconnect the battery with the engine running. Avoid creating sparks near fuel leaks or battery gases.
Clean the terminal and its mating surface until both provide firm metal-to-metal contact. Replace badly corroded eyelets, broken strands or damaged fasteners rather than polishing around them. Refit the connection securely, but take care not to strip threads in thin panels. Where a restoration has added paint or powder coating, provide a deliberate contact area instead of expecting a bolt to cut through the finish. Protect exposed metal against corrosion after the electrical joint is made, without insulating the contact surfaces.
Finally, reconnect the battery and repeat the original test with the component operating. Check that nearby functions still behave normally. If the fault persists, continue along the circuit rather than adding an improvised wire that could conceal damaged insulation or an incorrect connection. A labelled, secure repair is easier for the next owner—or your future self—to understand.
Keep good earths part of routine care
Earth faults often develop gradually as moisture, vibration and previous repairs take their toll. During routine checks, look for loose battery clamps, strained straps and corrosion around exposed connections, particularly at lamps and underbody mounting points. After bodywork or repainting, verify that removed earth wires have been refitted and that their contact areas have not been buried under a fresh finish.
Treat any repeated blown fuse, hot wire or melting insulation as a reason to stop using the affected circuit until the cause is found. An earth repair should restore a proper return path, not make an overloaded or shorted circuit work harder. With a careful inspection and a few targeted tests, an apparently mysterious electrical complaint can become a manageable series of connections to check.